
Paperlust prints vinyl banners in four sizes: 1220 x 760mm, 2000 x 1000mm, 3000 x 1000mm, and 4000 x 1000mm, all in 510gsm super heavy-duty industrial-grade vinyl. Choose your size from the table below, then read on for finishing, fixings, and how to hang each one without it coming down in the first gust.
- Sizes: 1220 x 760mm / 2000 x 1000mm / 3000 x 1000mm / 4000 x 1000mm
- Material: 510gsm super heavy-duty industrial-grade vinyl, tear-resistant and waterproof
- Finishing: Hemmed Edges Only / Hemmed Edges and Clear Eyelets / Hemmed Edges with Rope and Clear Eyelets
- Price: $70.36 for a single 1220 x 760mm banner; $54.71 each at a quantity of 20
- Shipping: flat-rate, Australia-wide
- Guarantee: 100% print guarantee
Which Size to Order
| Size | Dimensions | Use this when |
|---|---|---|
| Small | 1220 x 760mm | Counter display, indoor events, retail POS, framed installation |
| Medium | 2000 x 1000mm | Shopfronts, market stalls, single fence bay, small outdoor events |
| Large | 3000 x 1000mm | Site hoardings, festivals, building facades, multi-bay fencing |
| Extra-large | 4000 x 1000mm | Stadium fencing, roadside signage, large building wraps, high-visibility outdoor sites |
Three of the four sizes share the same 1000mm height. This matters if you are planning a perimeter fence run: banners at the same height line up cleanly without any shimming or adjustment at the fixings.
The Material
At 510gsm, this vinyl is substantially heavier than the 350-400gsm stock that cheaper banner suppliers use. The difference is not cosmetic. It shows in three practical ways.
The vinyl resists tearing at the eyelets. A lighter banner flexes under load and concentrates stress at each attachment point; the heavier material distributes tension across a larger area of reinforced hem, so the eyelet holds.
UV-resistant inks are printed directly into the surface, not laminated on top. Colours do not peel or flake after a few weeks in direct sun.
The material is fully waterproof. A banner installed before a weekend market can come down Monday morning in whatever condition the weather left it, with no damage to the print.
Finishing: The Detail That Actually Matters
Every banner ships with a hemmed edge as the starting point. The hem is a folded, welded border around the perimeter of the banner. It stiffens the edge, prevents fraying, and gives eyelets a reinforced surface to grip. Without a hem, any attachment point concentrates stress directly on the raw vinyl edge, which will tear.
The three finishing options build on that baseline:
Hemmed Edges Only suits banners that will be mounted in a frame, slid into a rod pocket on a pole system, or pinned to an indoor display board. There is no attachment hardware, so this option gives the cleanest look for interior installations where wind is not a factor.
Hemmed Edges and Clear Eyelets is the standard outdoor option. Clear plastic eyelets are placed at regular intervals along all hemmed edges. They accept cable ties, rope, bungee cords, or carabiners. Choose this whenever the banner will face any wind at all.
Hemmed Edges with Rope and Clear Eyelets adds pre-threaded rope through each eyelet. If you are installing on a fence or between posts and want to tie off straight from the box on site, this saves time on installation day.
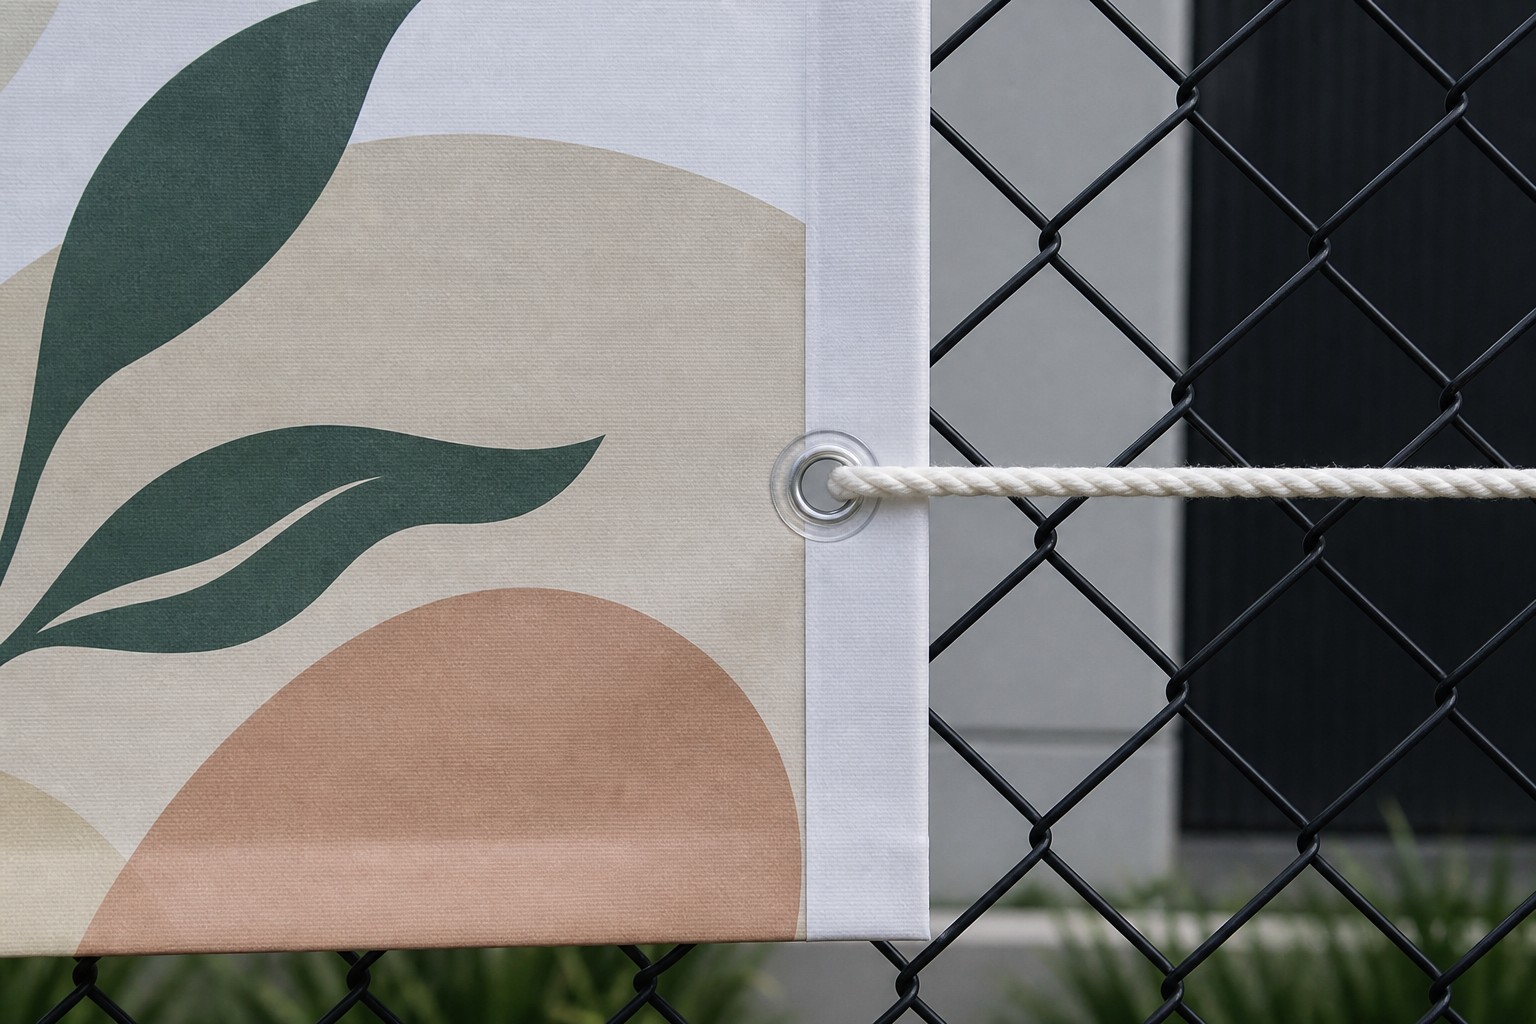
Eyelet spacing is proportional to banner size. Industry practice places one eyelet roughly every 600 to 1000mm along each edge. A 4000mm banner has more fixing points than a 1220mm banner, which is correct: more attachment points mean lower load on each individual eyelet.
How to Hang Your Banner
Against a wall. For timber framing, drive cup hooks or eye screws into the frame and clip the eyelets to them with carabiners or rope looped through. For masonry, use wall plugs and screw hooks. Run rope through multiple eyelets for even tension rather than pulling from corners only, which lets the banner belly and catch wind.
Between two posts. Thread rope through the eyelets from one post to the other, or use ratchet straps where you want tight, adjustable tension. On banners 3000mm or wider, add at least one mid-span attachment point on the top edge to prevent sagging.
On a fence. This is the most common setup for events and construction sites. Thread UV-rated cable ties through each eyelet and around the fence wire or bar. Use every eyelet, not just the corners. A banner attached at four points flaps between them, and the load on those four points accumulates with every gust. Attaching at every eyelet distributes the load across the full hem.
On scaffolding. Attach rope through the eyelets and loop it around scaffold tubes, tying off with a bowline or clove hitch. Leave a small amount of slack rather than pulling the banner drum-tight: some movement under load is safer than rigid attachment that transfers all stress directly to the eyelets.
Indoors at an event. Use Hemmed Edges Only if the banner will be framed or pinned. For banners on a truss or railing, eyelets with cable ties or S-hooks work cleanly and can be repositioned quickly if the layout changes during setup.
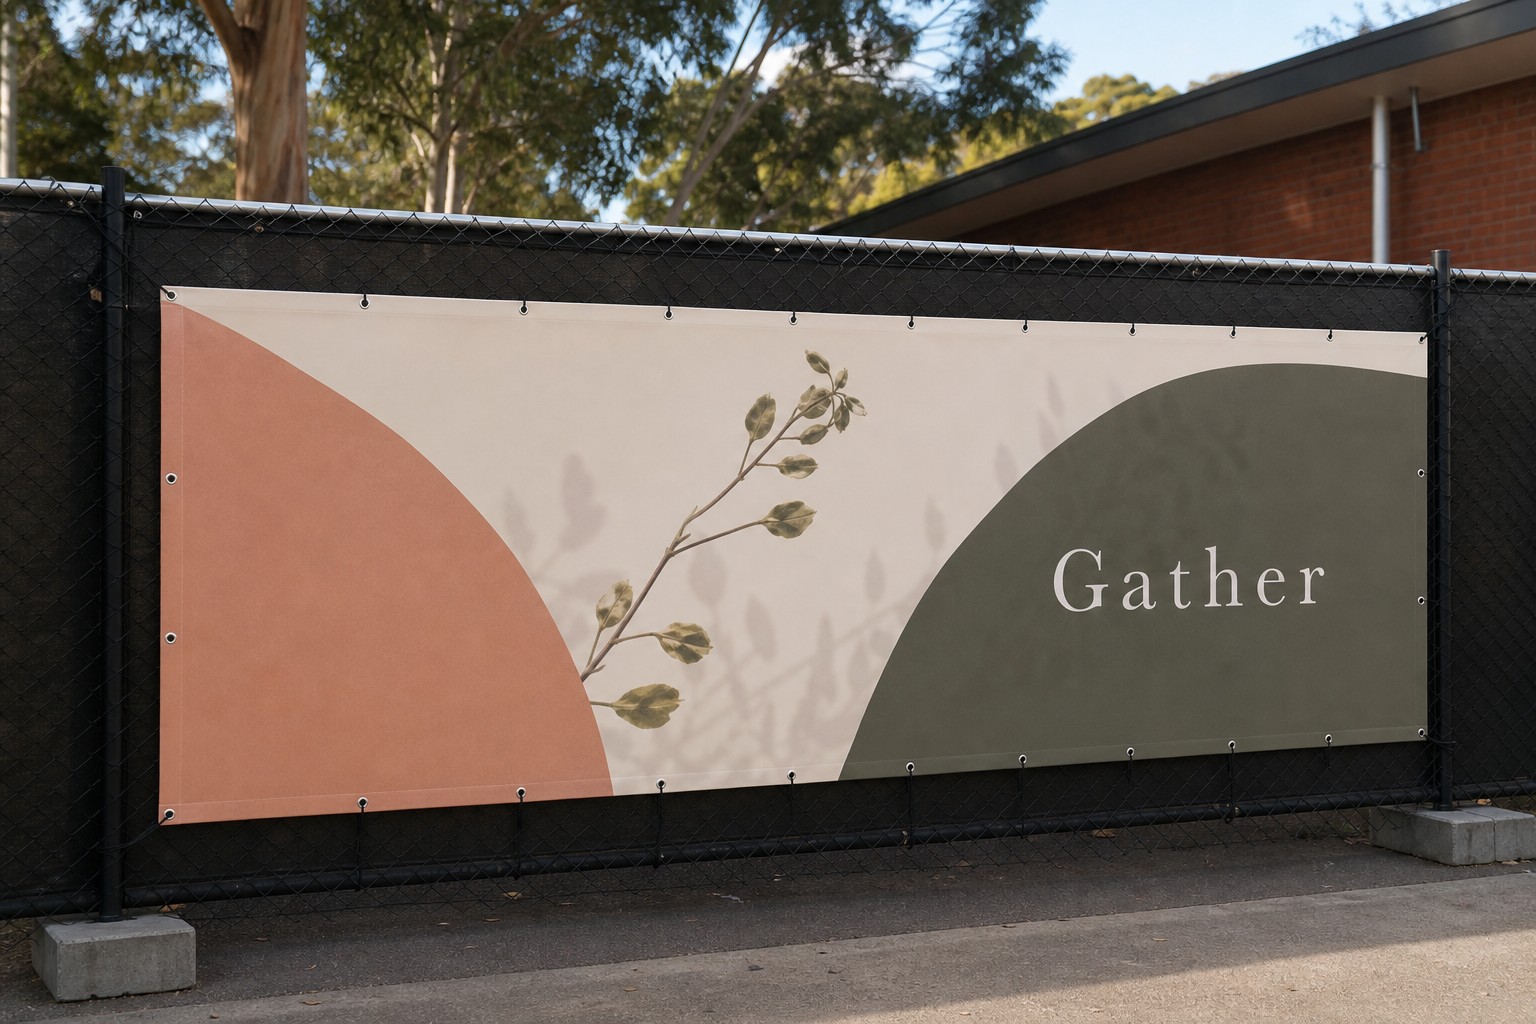
One point that causes more banner failures than anything else: over-tightening. When a banner is pulled rigid between two fixed points, any wind load transfers directly to the eyelets. The eyelet punches through the hem and the banner is unusable. Attach firmly, not tightly. A bungee cord on each side of a fence installation absorbs gusts rather than transmitting them straight through to the fixings.
Wind: the Single Biggest Cause of Banner Failure
A solid vinyl banner in an exposed position is a sail. The larger the banner, the larger the sail. A 4000 x 1000mm banner presents four square metres of unbroken surface to the wind.
On a sheltered shopfront or in an indoor venue, this is irrelevant. On an exposed site (a construction fence on a coastal road, a festival perimeter in an open paddock, scaffolding with no windbreak), the load on each fixing point multiplies with every increase in wind speed.
The typical failure sequence is: wind load exceeds the resistance of one eyelet, the vinyl tears around it, the remaining fixing points take the full load, and the whole banner comes off within minutes.
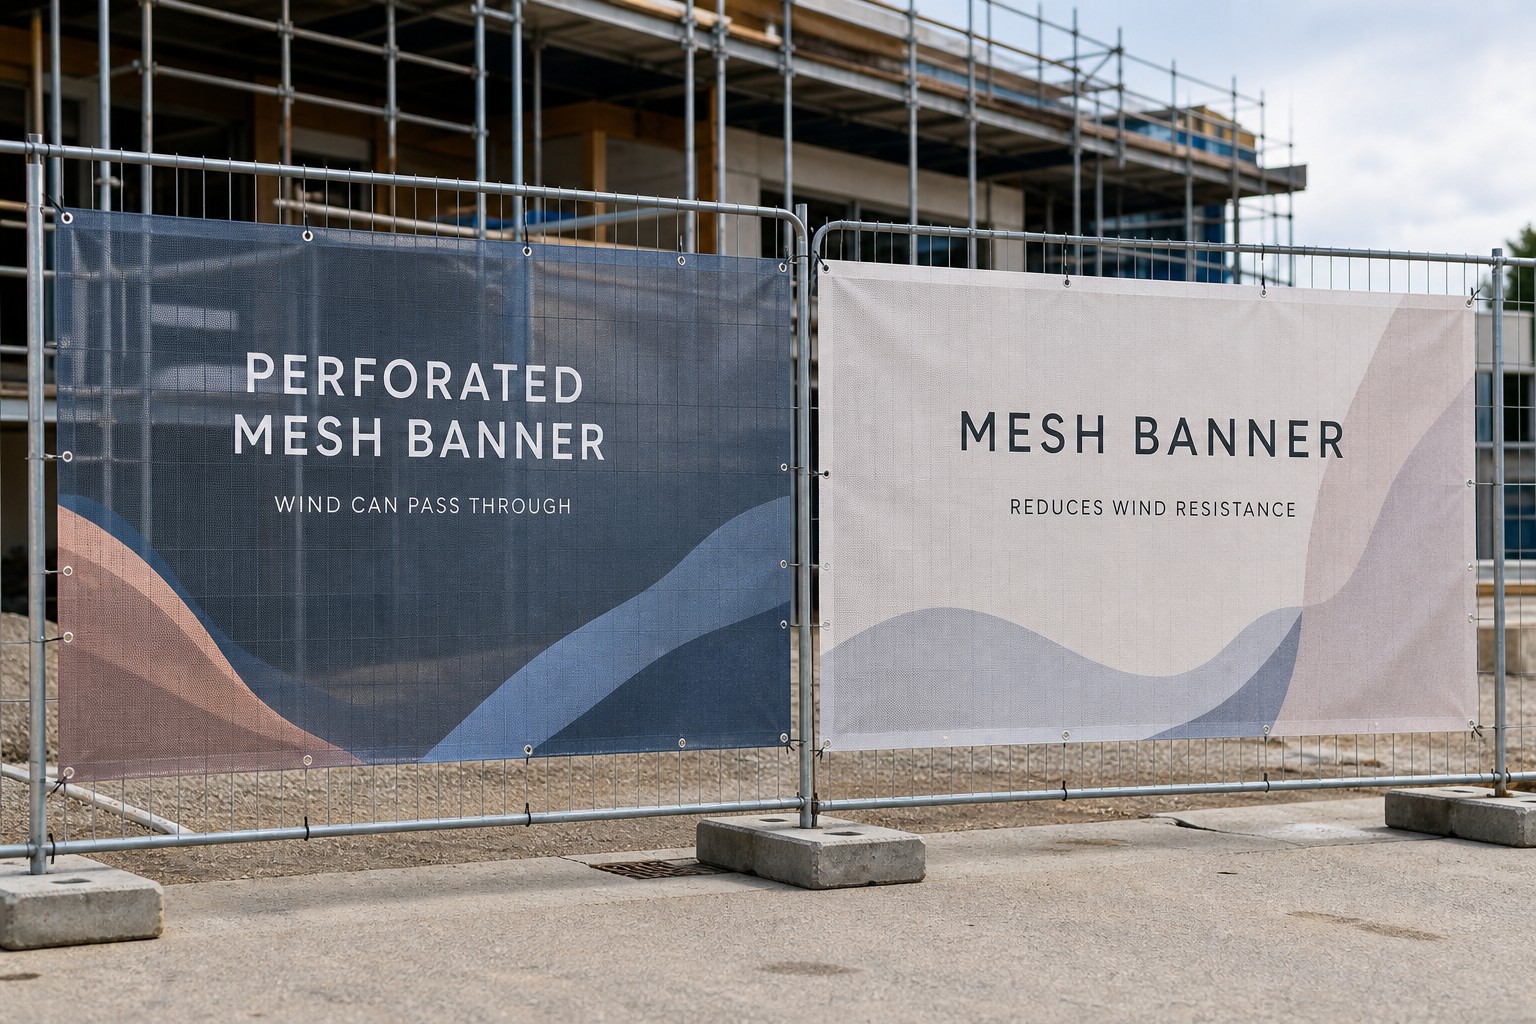
If your site is consistently exposed to wind, the correct product is a mesh banner, not a solid vinyl banner. Mesh allows air to pass through the surface, which cuts the effective wind load by a large margin. It is the standard material for fencing around construction sites in exposed coastal and high-rise locations. You can see the Paperlust mesh banner option at printshop.paperlust.co/products/mesh-banner-digital-print.
If the site is moderately exposed (occasional gusts rather than sustained wind), use every eyelet and fit bungee cords on at least the top edge so the banner can flex without tearing.
Artwork Setup
Supply artwork at 300dpi at print size for every banner size.
Keep logos, body text, and any content that must be read at a distance clear of the hem zone. Hems fold the material inward around the perimeter. Artwork that runs to the very edge of the file will be folded under and hidden. As a working rule, keep nothing important within 50mm of any edge and confirm the exact safe zone using the Paperlust artwork template for the size you are ordering.
The same principle applies to eyelet positions. Eyelets sit within the hemmed border, so if your content is safely inside the hem zone, the eyelets will not intersect it. On the 1220mm banner, think about where the corner eyelets will land relative to your design, particularly if the design runs close to any corner.
Pricing
A single 1220 x 760mm banner costs $70.36 including GST. At a quantity of 20, the price falls to $54.71 each.
Flat-rate shipping applies on all orders, Australia-wide. Production runs for two to three working days after your design proof is approved. A proof is included with every order and sent before printing begins, so you can check the layout and colour before anything goes to press.
Frequently Asked Questions
What sizes does Paperlust print vinyl banners in?
Four standard sizes: 1220 x 760mm, 2000 x 1000mm, 3000 x 1000mm, and 4000 x 1000mm.
What finishing options are available?
Three options: Hemmed Edges Only, Hemmed Edges and Clear Eyelets, and Hemmed Edges with Rope and Clear Eyelets.
What does the hem actually do?
The hem is a folded, welded border around the banner’s perimeter. It reinforces the edge against tearing, prevents fraying, and gives eyelets a strong surface to grip. Without a hem, any fixing point is a tear point.
How far apart are the eyelets?
Eyelets are spaced at regular intervals along all hemmed edges, with more fixing points on longer banners. Industry standard places one eyelet every 600 to 1000mm.
What should I use to attach the banner?
UV-rated cable ties work well on fences. Rope or ratchet straps suit installations between posts or on scaffolding. Bungee cords are worth using on the top edge of any outdoor banner in a moderately exposed location, as they absorb gusts rather than transmitting the full load to the eyelets.
When should I use mesh instead of vinyl?
If the banner will be installed in a consistently exposed outdoor location such as a coastal site, scaffolding on a high-rise, or an open field perimeter, choose mesh. Mesh allows air through the surface, which significantly reduces wind load on the fixings. Solid vinyl in exposed positions can fail quickly.
How much clearance do I need from the banner edge in my artwork?
Keep logos and body text at least 50mm from the edge of your artwork file. This ensures the hem fold does not cover your content. Confirm the exact safe zone with the Paperlust artwork template for your chosen size.
How long does production take?
Two to three working days after your design proof is approved. A proof is included with every order.