The pack on the bench looks like a sheet of clear tape with your lettering sitting behind it, and the first instinct is to peel a corner to see what happens. Before you do, it helps to understand how to apply vinyl lettering as a single pre-spaced piece rather than as a row of separate characters.
This product is cut vinyl lettering, not a printed sticker. There is no ink layer and no background sheet behind the letters. The colour is the film itself, and the surface you apply it to remains visible through the gaps and centres of every character. Each piece is made to order in Australia, hand weeded and already spaced on transfer tape, so the whole layout goes on in one movement. The production time for your order is 3 to 5 working days, and transit time is separate.
The guide below covers surface prep, the single-piece dry method, the guide-line method for designs larger than one piece, which surfaces suit the product, and what to expect when it is time to remove it.
The short version
- Cut lettering is not a printed decal. The colour is the vinyl itself, so there is no background and the surface shows between characters.
- Every piece arrives hand weeded and pre-spaced on transfer tape, so the letter spacing is already set.
- The core method: clean the surface, position the piece with transfer tape still in place, press the letters down firmly, then peel the tape back at a low angle.
- For designs larger than one piece, mark a guide line first and step back to check alignment before removing any backing.
- It suits smooth, non-porous surfaces such as glass, painted metal, plastic, sealed timber and smooth painted walls.
- The adhesive is permanent and single-use, so position carefully before the backing comes away.
What cut vinyl lettering actually is
Once the pack is open, the easiest way to understand the job is to put the printed sticker comparison aside. We cut custom vinyl lettering from self-adhesive film, which means the colour you see is the film itself. There is no ink layer, no white background and no cut line around a printed shape. The surface shows between and inside every character, and that is what gives the finished job the look of hand-painted signwriting.
That single design difference changes what application actually tests. With a printed film, the usual problem is air trapped under a large flat sheet. With cut vinyl, the letters are individual shapes of film with edges all the way around, so bubbles are rarely the failure point. The failure point is a layout that goes down crooked, or a character edge that lifts because the surface was not clean enough to hold the permanent adhesive.
If your order has a visible background sheet, you are holding printed vinyl stickers and should move to that guide. If the letters are individual, keep reading.
Still deciding between the two? Read the comparison on decals and stickers to work out which one your job needs, then come back here when the lettering is on the bench.
Why your lettering arrives on transfer tape
A piece of cut vinyl lettering arrives as three layers: backing paper on the bottom, the cut letters in the middle, and a sheet of transfer tape on top. The transfer tape is the clear film you can see through the tube, and it is not packaging. It holds every letter in position until the whole piece is placed.
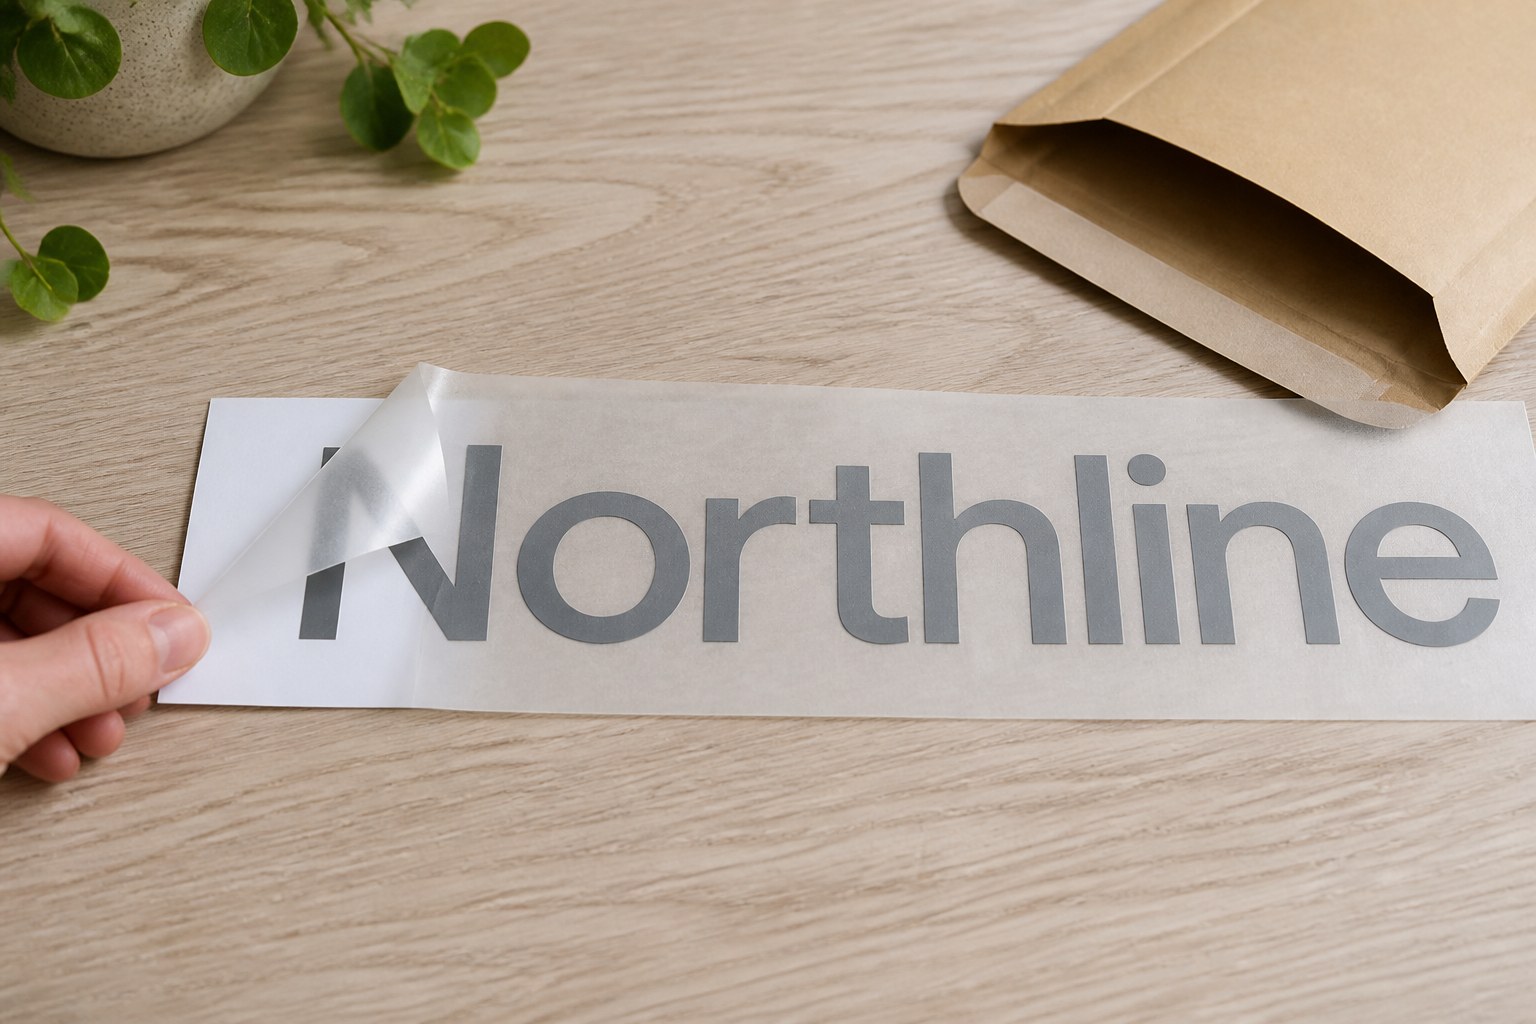
Before it leaves us, each piece is hand weeded. That means the waste vinyl between and inside the letters has already been picked out, so you do not have to remove the small centres of letters such as A or O. Because the letters are already pre-spaced on transfer tape, the spacing between them is fixed. You are not positioning one letter at a time.
Each piece is cut in one colour. A design with two colours arrives as two separate pieces, and you position the second colour after the first is down. The colour split is fixed before it is cut, so what looks like a single design in a sketch can be two physical sheets on the bench.
When the pack first arrives, lay the piece flat and check it against the surface before anything is peeled. The clear tape lets you see the letter positions, so you can spot a size or spelling problem before the adhesive is exposed.
Preparing the surface before anything is peeled
Cut vinyl lettering suits a narrow but common set of surfaces: glass shopfront windows, glassware, drink bottles, painted metal, plastic, sealed timber and smooth painted walls. The shared property is that they are smooth and non-porous. A non-porous surface gives the adhesive a continuous grip, while a porous or textured surface breaks the contact area between the film and the surface.
Whatever surface you are using, the rule before starting is the same: it must be clean, dry and free of dust and grease. This guide does not name a specific cleaning product, because the requirement is not a brand. The surface simply has to have nothing on it that will sit between the adhesive and the substrate.
That matters more with cut vinyl than with a large printed sticker. The adhesive is permanent, and a thin character edge has very little area to hold with. Dust or grease tends to show up first at the edges of letters, where a corner lifts away because the film never made full contact.
How to apply vinyl lettering in one piece
The single-piece vinyl lettering installation method is dry and has four movements: clean, position, press, peel. If you have a printed film in front of you instead, follow the steps for applying a printed vinyl decal, because the failure points are different. For cut vinyl, the sequence below is the job.
Start with the clean, dry surface from the section above. Then position the whole piece with the transfer tape still in place. This is the step people rush, and it is the only step where you can still make changes. The backing paper is still covering the adhesive, so the sheet can be lifted and adjusted without sticking. Step back and look at the piece from the same angle a customer or passer-by will see it.
Once the position is right and the backing paper is out of the way, press the letters down firmly through the transfer tape. Work across every character, including the thin cuts and small centres. The pressure is what allows the adhesive to grab the surface while the letters are still held in position by the tape.
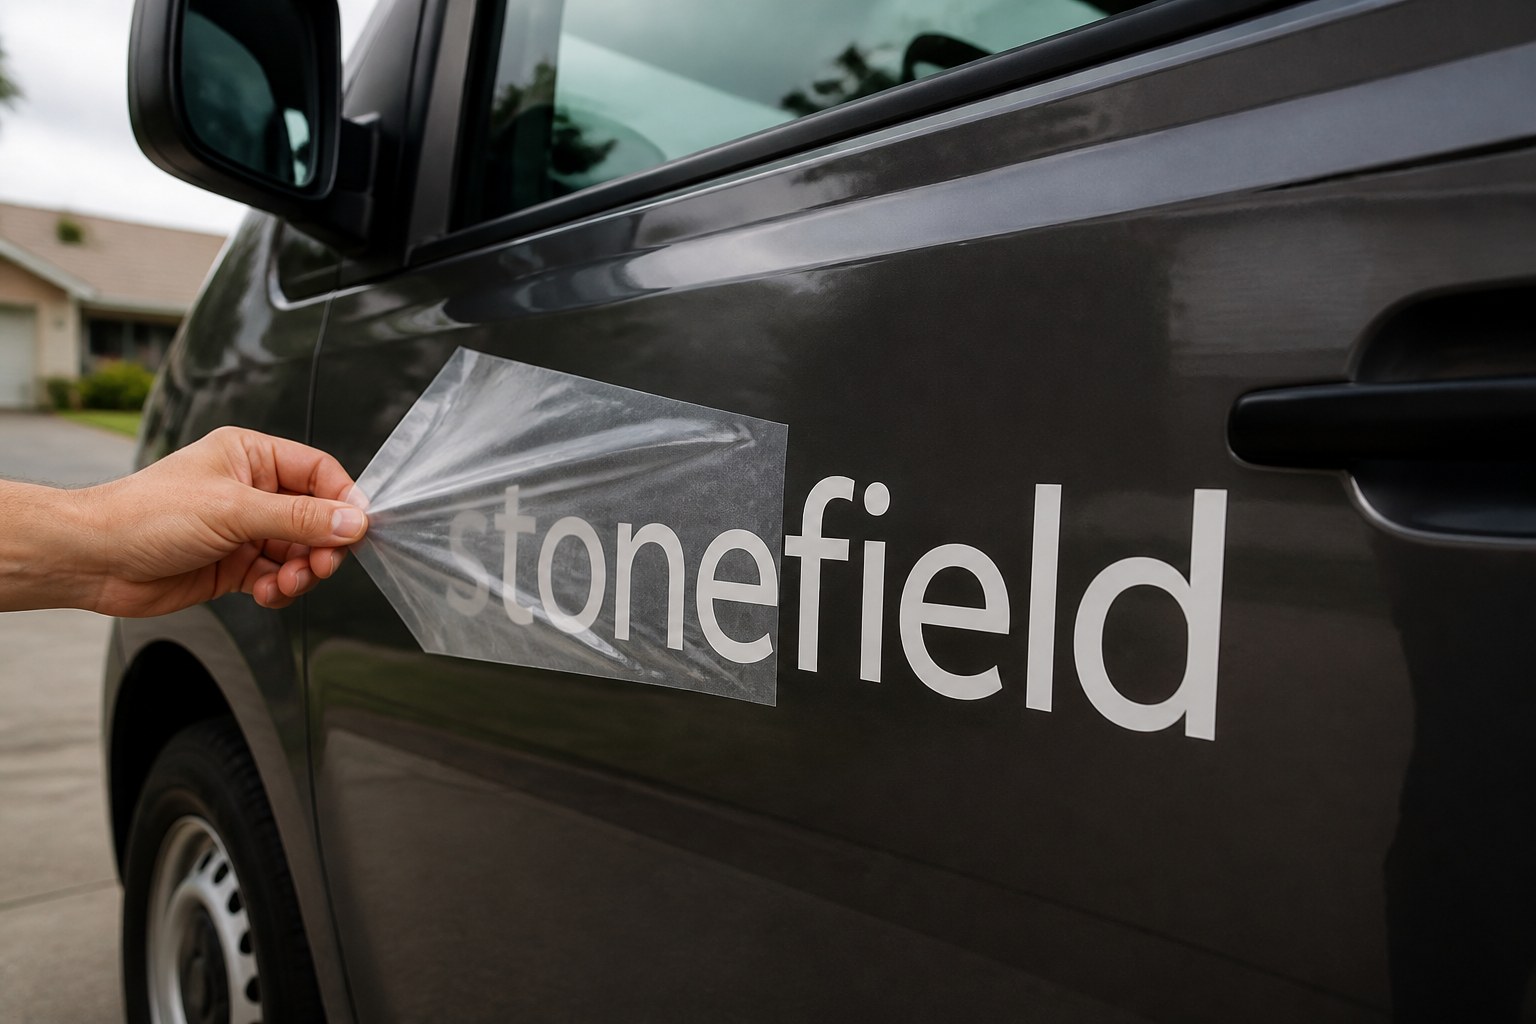
Then peel the transfer tape back slowly at a low angle, not straight up. A low angle spreads the separation across a longer edge and helps the tape release without dragging the letters. If a letter starts to lift with the tape, lay the tape back down over it, press that area again, and continue more slowly. Rushing the peel is the fastest way to pull a letter off the surface.
Positioning pieces larger than 600 x 260mm
The largest single piece is 600 x 260mm, measured as width by maximum letter height. The five pre-set size blocks are 200 x 100mm, 300 x 150mm, 400 x 200mm, 500 x 260mm and 600 x 260mm. A design larger than the largest block comes in multiple pieces, each within the 600 x 260mm maximum, so positioning those pieces is part of your application job.
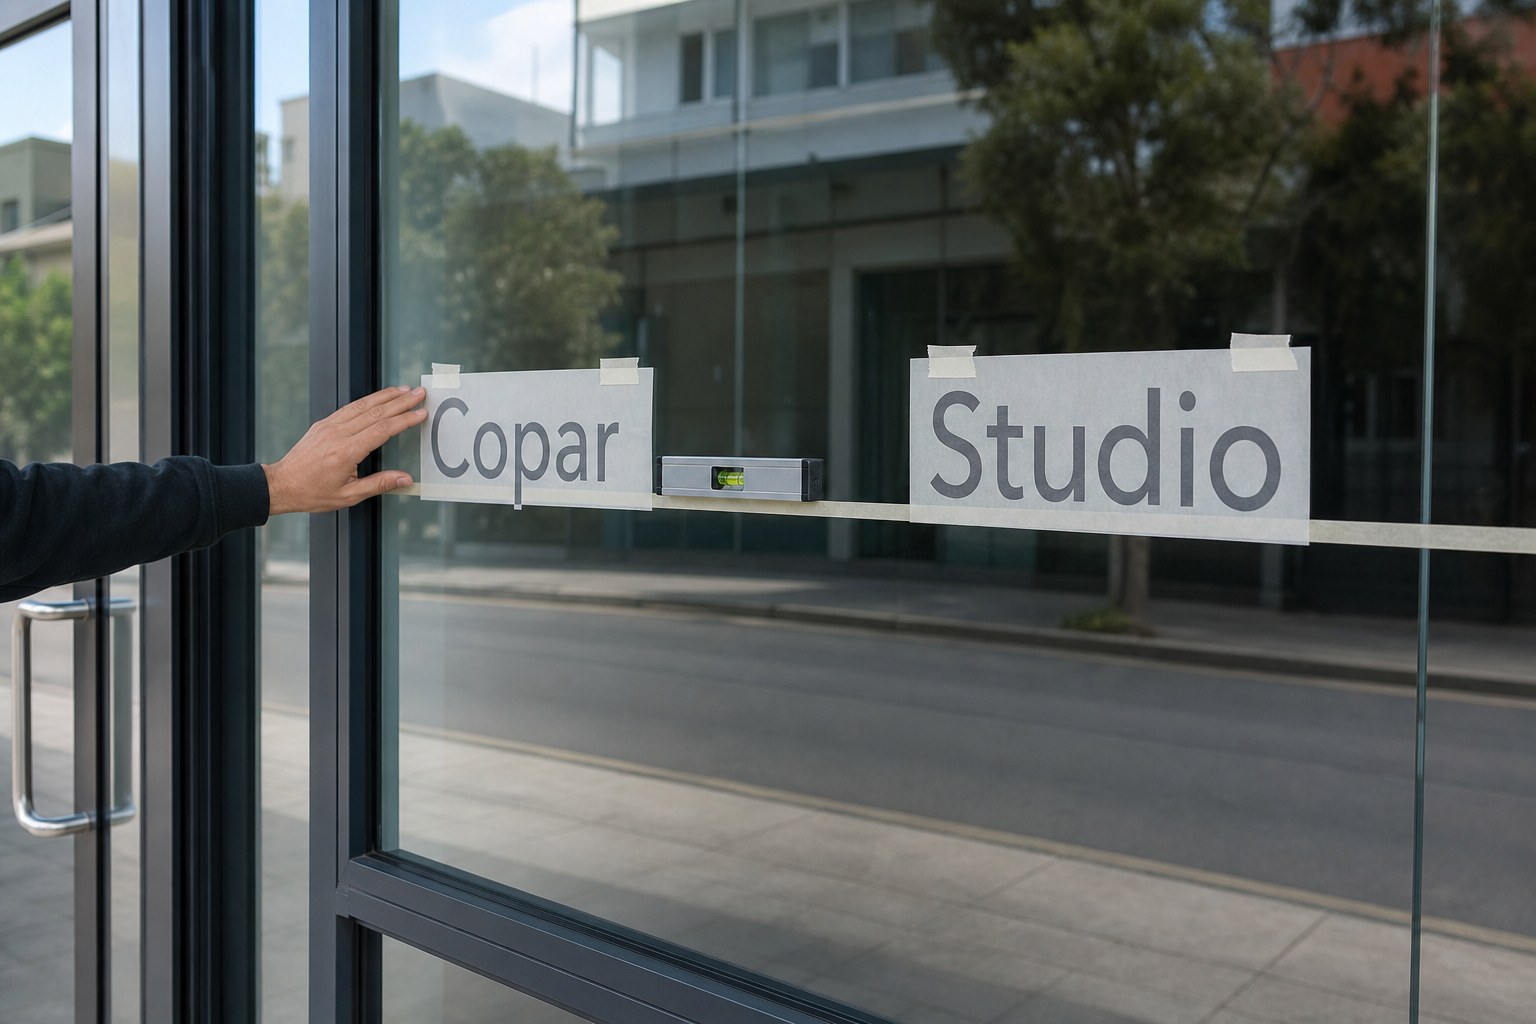
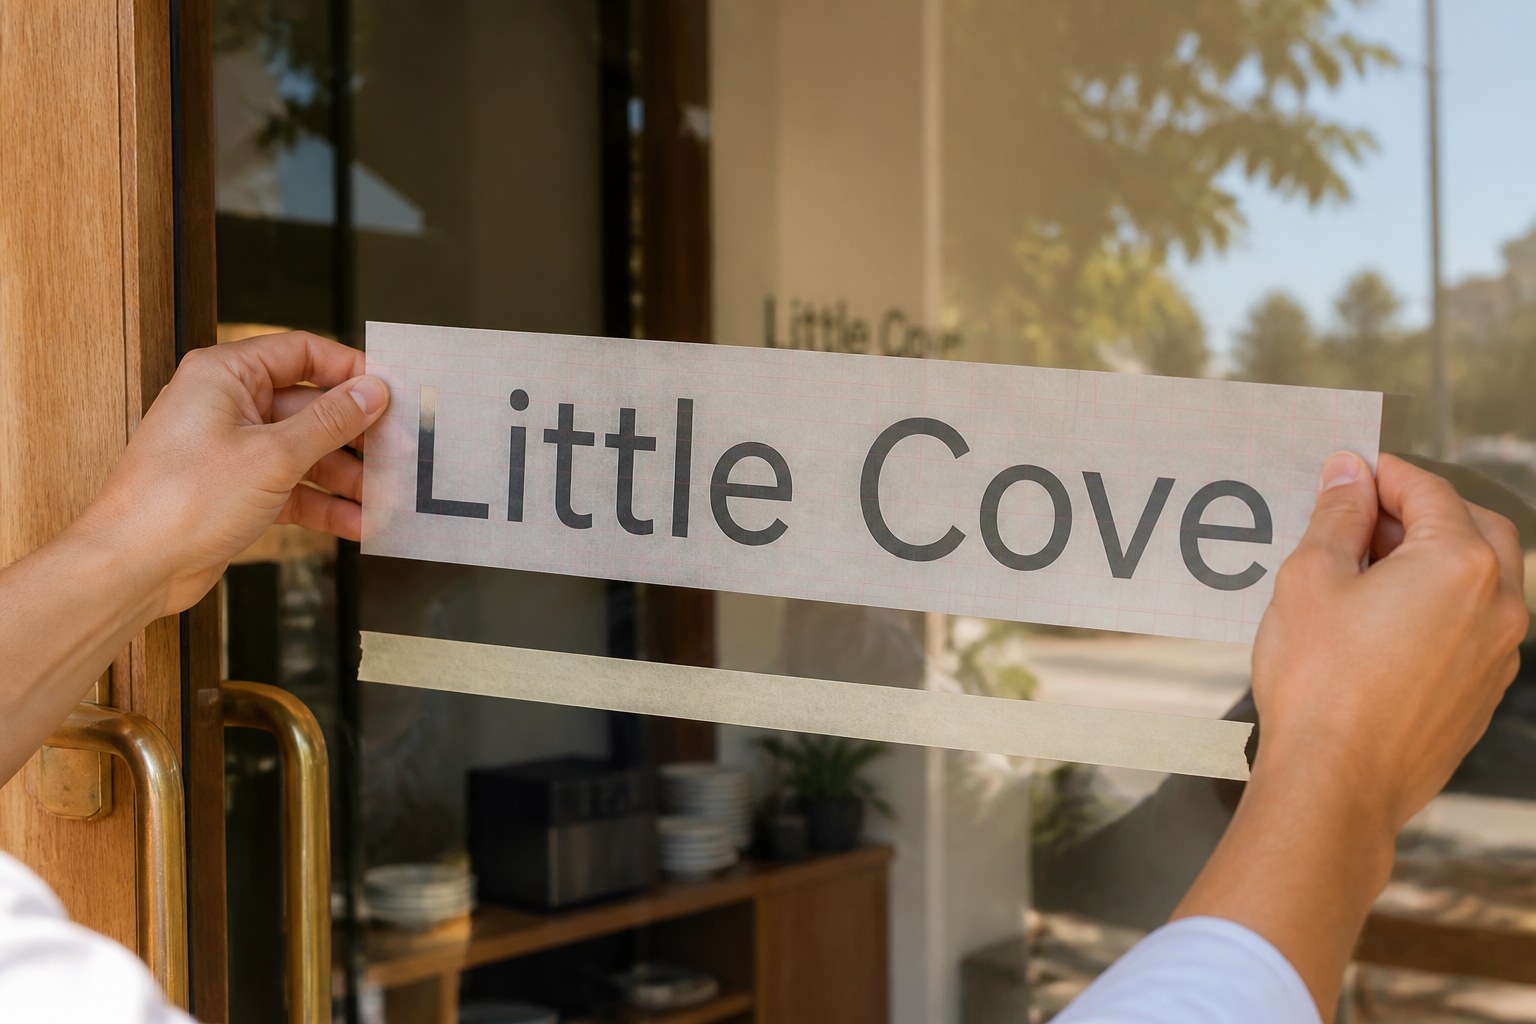
This is the point where most mistakes happen. A long shopfront name or a van sign that spans two pieces needs a guide line before any backing is removed. Mark a straight guide line first with low-tack masking tape and a spirit level, or use an existing straight edge such as a window frame or panel line. The guide line gives every piece the same baseline, so the final word does not ripple.
Work in order, one piece at a time, left to right or top to bottom, keeping spacing consistent. Tape each piece in position with masking tape and step back to check alignment before removing the backing. Apply the next piece only after the previous one is pressed down firmly. This is the part of the job that takes the time, and it is what separates a straight shopfront from a wavy one.
Where to use it: glass, windows, vehicles, boat hulls and more
Shopfront glass and windows are the most common use. The smooth, non-porous surface suits the dry application method. The glass stays visible in the gaps and centres of every letter. Vehicle panels and glass work the same way, provided the panel is clean and dry before the piece goes down.
Boats take the same product, but with one rule: use it above the waterline on clean painted panels or glass. Boat names and registration numbers work well above the waterline, and longer names arrive in several pieces that you align on the hull during application. The same guide-line method from the large-piece section keeps a long name level.
Smooth painted walls are another option. Because the letters have no background, the wall colour shows between and inside the characters, which is why the finished effect reads like signwriting rather than a plaque. Glassware and drink bottles suit the product too, but hand wash only. The lettering is not dishwasher safe.
Your lettering must be at least 20mm high, and no stroke may be thinner than 5mm. Anything smaller cannot be weeded and applied cleanly, so very small text is not offered. If you need a rigid panel rather than lettering, our corflute signs are a separate product.
How long it lasts and how to remove it
Standard colours are cut from 70 micron gloss calendered vinyl with permanent adhesive. Outdoor life is up to 3 years for standard colours, and up to 5 years for Black and White. The three metallic finishes, Gold, Rose Gold and Silver, are best suited to indoor and sheltered outdoor use.
Removal is possible later, but it is not a reuse step. Letters can be removed, but they are single-use and do not re-stick. If you plan to move a vehicle, rename a boat or rework a wall, plan to reorder the piece rather than lift and reuse it.
That is the practical consequence of the permanent adhesive. Surface prep and a guide line are not preliminary busywork; they are the application. A piece placed straight and pressed firmly will stay put, but a piece placed crooked cannot be lifted and reused. You get one placement, so the ten minutes spent checking the line is the whole job.
Frequently asked questions
Do I need a squeegee or special tools?
Not for a single piece. The method is to position the piece with the transfer tape still in place, press the letters down firmly through the transfer tape, then peel the tape back slowly at a low angle. For multi-piece work, have low-tack masking tape and a spirit level on hand for the guide line. No applicator, squeegee, spirit level or tape is supplied with the order, so collect those before you start if your design spans more than one piece.
What is the largest piece you can apply?
The largest single piece is 600 x 260mm, measured as width by maximum letter height. For anything larger than that, the job is split into multiple pieces, each within the 600 x 260mm maximum. You position and align those pieces yourself during application. Work with a guide line for anything that spans more than one piece, so the baseline stays straight. The same rule applies to a long shopfront name or a boat name that runs across more than one panel.
What is the smallest letter height?
Vinyl letters need a height of at least 20mm and a stroke of 5mm or thicker, so choose a bold font if your text is small. Anything smaller cannot be weeded and applied cleanly, which is why very small text is not offered. The 20mm minimum applies to the lettering as it is cut, so keep that in mind when you are setting up a design with a large number of characters or a long line. If the space cannot take 20mm letters, a printed sticker or another product may be the better route.
Which surfaces does vinyl lettering suit?
It suits smooth, non-porous surfaces. Glass shopfront windows, glassware, drink bottles, painted metal, plastic, sealed timber and smooth painted walls are the main options. The surface must be clean and dry before application. A non-porous surface gives the permanent adhesive a continuous grip, so the edge of each letter holds well. Porous or textured surfaces are not suitable because the adhesive has less contact area.
Can the letters be repositioned or reused?
No. Cut vinyl lettering is permanent and single-use. The letters can be removed later, but they do not re-stick once they have been peeled away. That is why positioning happens before the backing is removed and why the guide line matters for multi-piece work. If you plan to move a vehicle or rework a wall, plan to reorder the piece rather than lift and reuse it.
Can I use it for a boat name or registration number?
Yes. Boat names and registration numbers work well above the waterline on clean painted panels or glass. Keep the lettering above the waterline, not below it on wetted or submerged hull sections. Longer boat names are supplied as multiple pieces, so use a guide line and align each piece on the hull during application. The same clean, dry surface rule applies before anything is pressed down.