
The Australian standard business card is 90 x 55mm. At 300dpi, the print standard, that equals 1063 x 650 pixels. Add 3mm bleed on every side and your canvas becomes 1134 x 720 pixels.
Those two numbers are all most designers need. The rest of this guide explains how the arithmetic works, why getting it wrong costs you a reprint, and how to set up your file correctly in Canva, Photoshop, and Illustrator.
- Standard 90 x 55mm, trim size: 1063 x 650 px
- Standard 90 x 55mm, with 3mm bleed: 1134 x 720 px
- Circle 60 x 60mm, trim size: 709 x 709 px
- Oval 90 x 50mm, trim size: 1063 x 591 px
- Square 60 x 60mm, trim size: 709 x 709 px
- Slimline 90 x 45mm, trim size: 1063 x 531 px
- Slimline 86 x 54mm, trim size: 1016 x 638 px
- Conversion formula: mm / 25.4 x dpi = pixels
- Colour mode for print: CMYK
- Recommended format: print-ready PDF
Pixel dimensions at 300dpi and 150dpi
The conversion formula is straightforward: divide the measurement in millimetres by 25.4 (the number of millimetres in an inch) to get the size in inches, then multiply by your chosen dpi. For a 90mm width at 300dpi: 90 / 25.4 = 3.543 inches; 3.543 x 300 = 1063 pixels. You can verify any figure in this guide using that basis.
The tables below do that arithmetic for every business card shape available, at both 300dpi and 150dpi, with and without a standard 3mm bleed.
Standard rectangle (90 x 55mm)
| Setting | Width | Height |
|---|---|---|
| 300dpi, no bleed (trim size) | 1063 px | 650 px |
| 300dpi, with 3mm bleed | 1134 px | 720 px |
| 150dpi, no bleed | 531 px | 325 px |
| 150dpi, with 3mm bleed | 567 px | 360 px |
Circle (60 x 60mm)
| Setting | Width | Height |
|---|---|---|
| 300dpi, no bleed | 709 px | 709 px |
| 300dpi, with 3mm bleed | 780 px | 780 px |
| 150dpi, no bleed | 354 px | 354 px |
| 150dpi, with 3mm bleed | 390 px | 390 px |
The circle card is set up on the 780 x 780 px square canvas at 300dpi, then a standard die cuts it to the 60 mm circle. Keep text and logos at least 4 mm inside the cut line. You order that file as round business cards.
Oval (90 x 50mm)
| Setting | Width | Height |
|---|---|---|
| 300dpi, no bleed | 1063 px | 591 px |
| 300dpi, with 3mm bleed | 1134 px | 661 px |
| 150dpi, no bleed | 531 px | 295 px |
| 150dpi, with 3mm bleed | 567 px | 331 px |
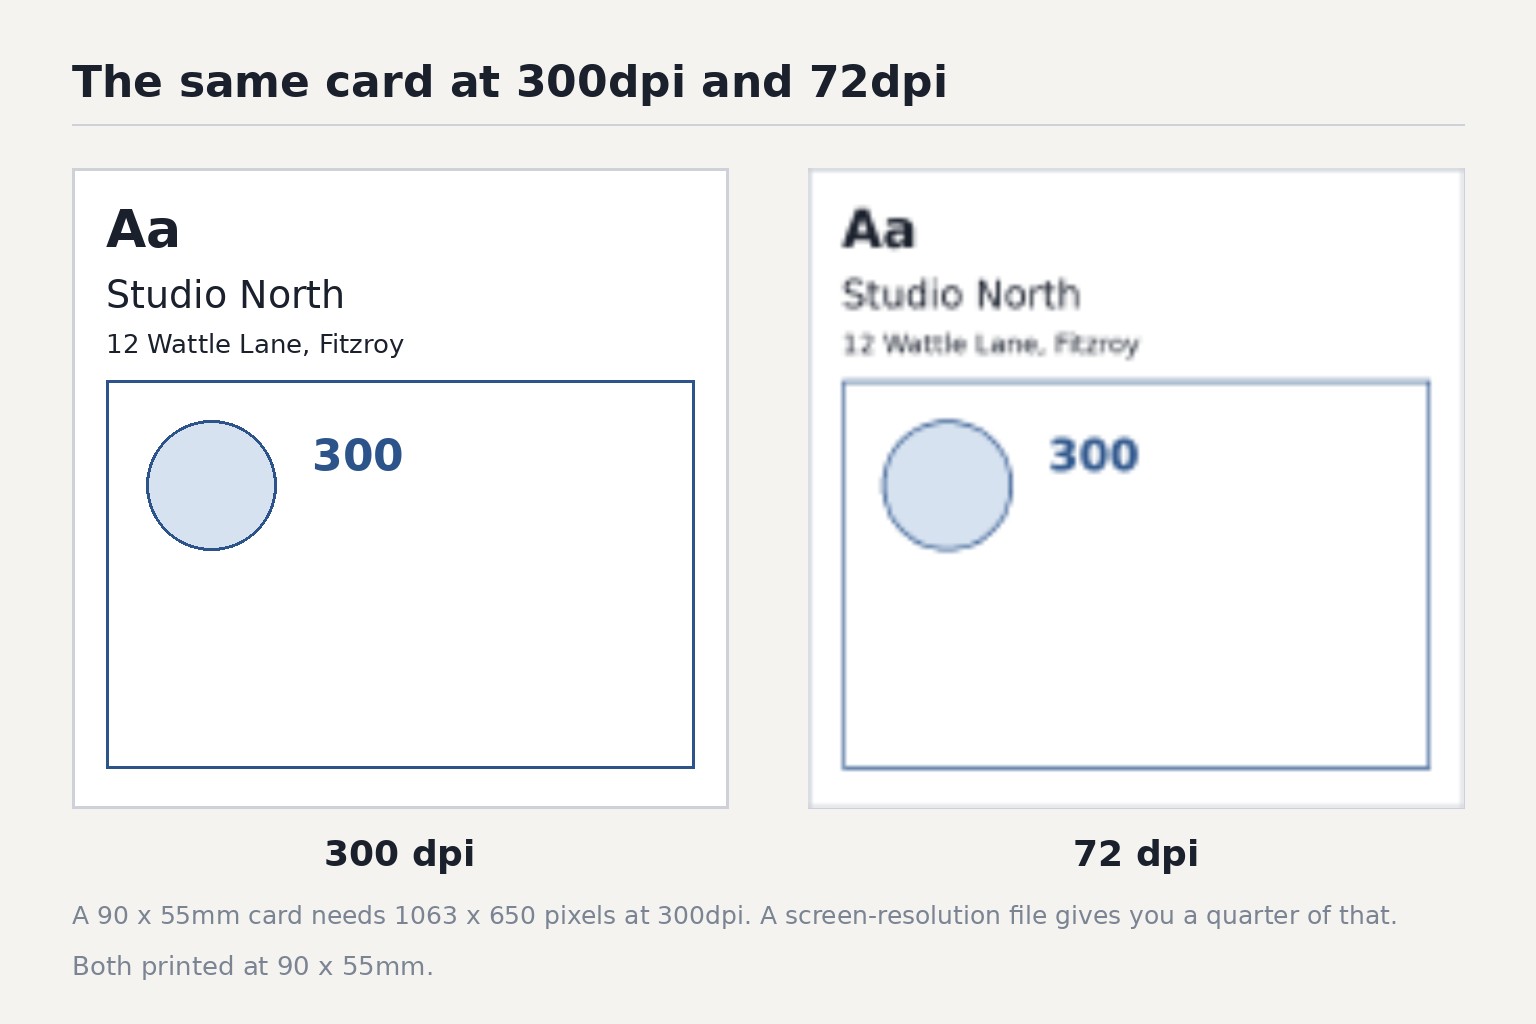
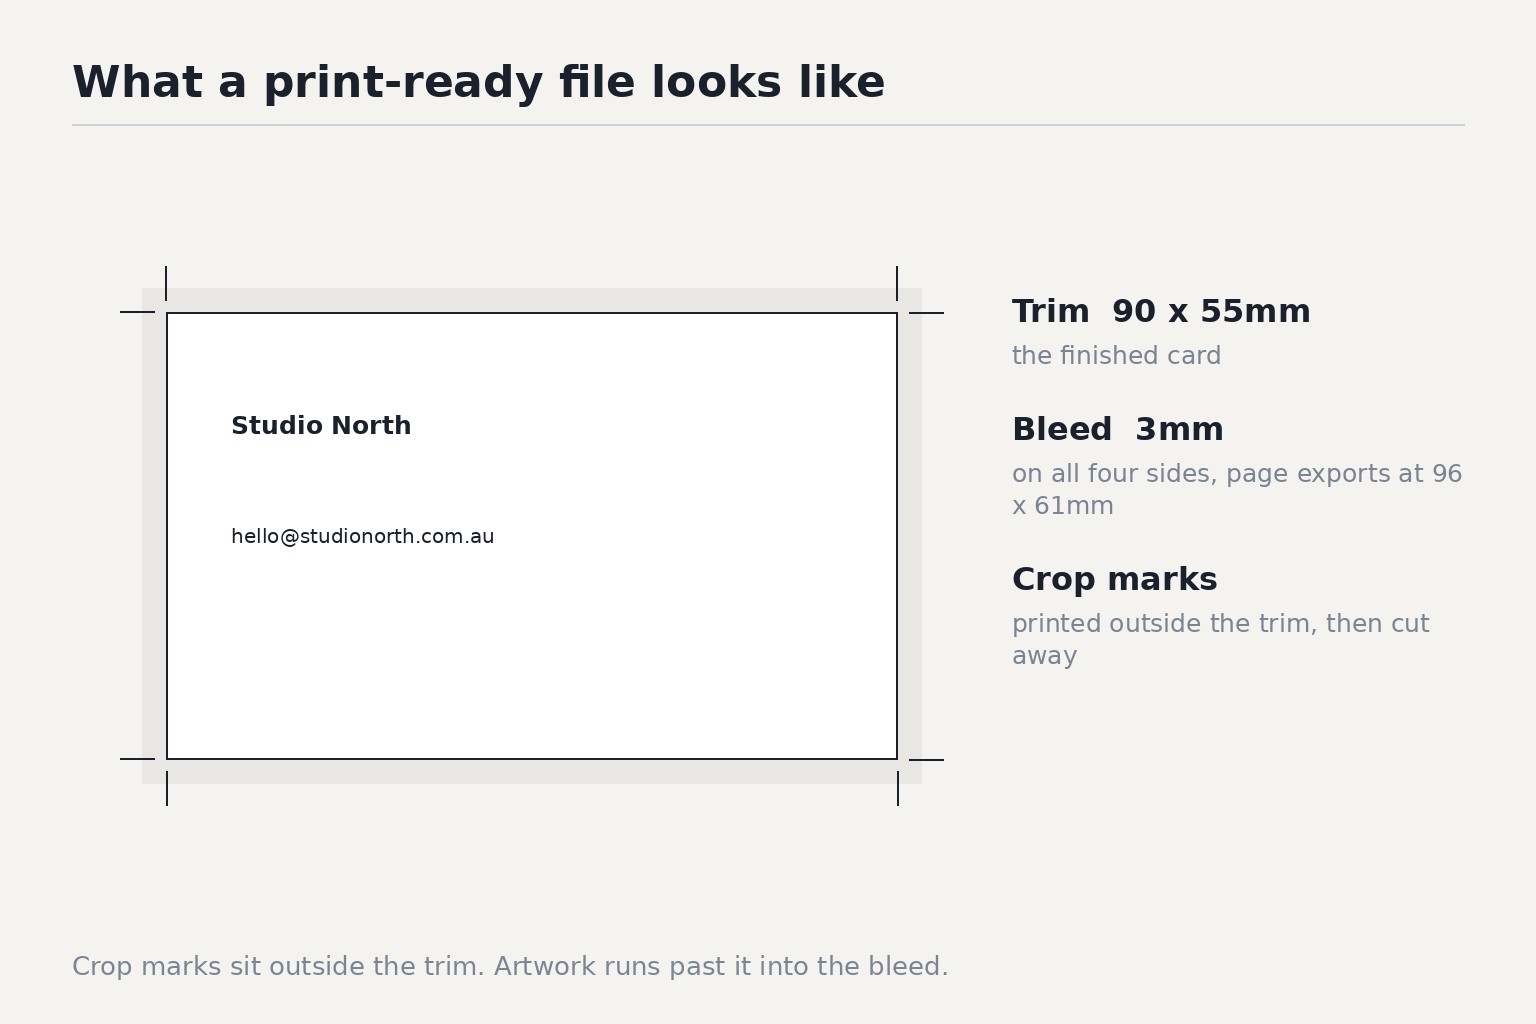
Bleed extends 3mm beyond the trim line on all four sides. That is why both width and height each gain 6mm (3mm x 2) when bleed is included. For the oval, the width with bleed matches the rectangle because the cards share the same 90mm base.
Square (60 x 60mm)
| Setting | Width | Height |
|---|---|---|
| 300dpi, no bleed (trim size) | 709 px | 709 px |
| 300dpi, with 3mm bleed | 780 px | 780 px |
| 150dpi, no bleed | 354 px | 354 px |
| 150dpi, with 3mm bleed | 390 px | 390 px |
The square format uses the same 780 x 780 px bleed canvas as the circle, but keeps its straight edges and corners at 60 x 60 mm and needs no dieline. The trimmed result is the square business cards product you order for that size.
Slimline (90 x 45mm and 86 x 54mm)
| Setting | 90 x 45mm | 86 x 54mm |
|---|---|---|
| 300dpi, no bleed (trim size) | 1063 x 531 px | 1016 x 638 px |
| 300dpi, with 3mm bleed | 1134 x 602 px | 1087 x 709 px |
| 150dpi, no bleed | 531 x 266 px | 508 x 319 px |
| 150dpi, with 3mm bleed | 567 x 301 px | 543 x 354 px |
The 90 x 45 mm slimline option holds the full 90 mm width of a standard Australian card while trimming its height, and the 86 x 54 mm option matches the footprint of a bank or credit card. Both sizes are ordered from the same product, slimline business cards, where you pick 90 x 45 mm or 86 x 54 mm.
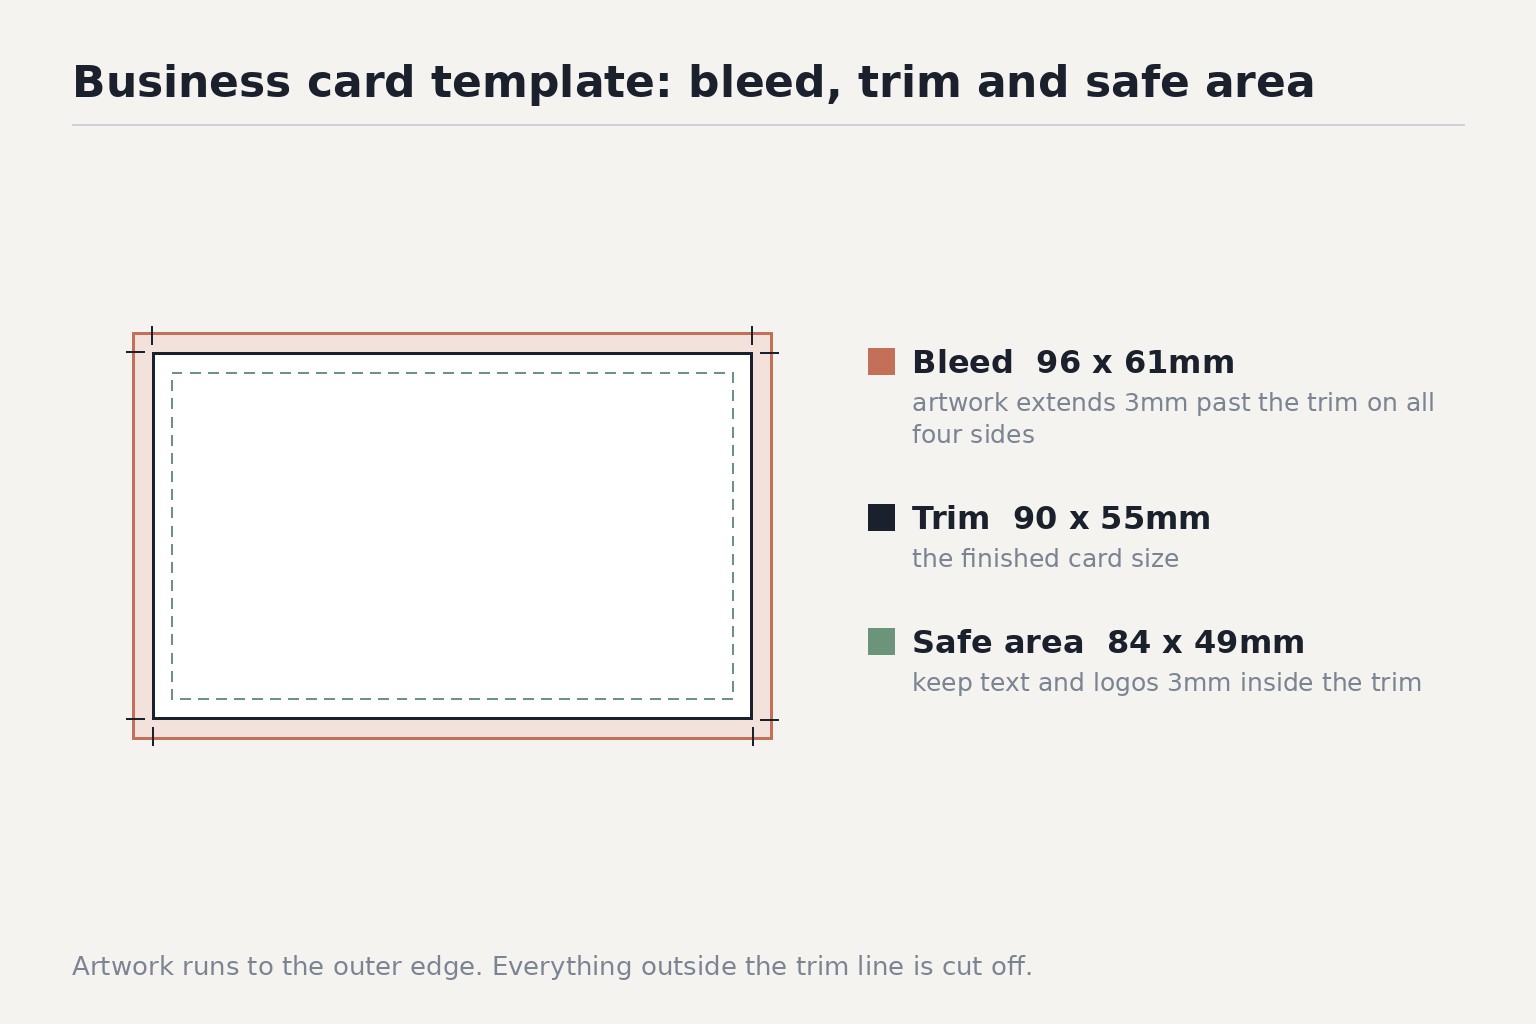
Why 72dpi is the single most common reason a business card file gets rejected
Screens display content at 72 to 96 pixels per inch. When you open a 72dpi document in Photoshop, everything looks correct: the card fills the canvas, the text is legible, the colours look rich. The problem is physical size.
A 1063-pixel-wide image at 72dpi is 14.76 inches wide on paper, not 3.54 inches. The pixel count is identical, but at print resolution (300dpi), those same 1063 pixels only span 3.54 inches. If you built your design at screen resolution, you have roughly one-quarter of the pixels the printer needs.
Put another way: a business card at 72dpi would only need to be about 254 x 155 pixels to match the physical dimensions. At 300dpi, the canvas needs to be 1063 x 650 pixels. The difference is not marginal. At 72dpi, body text turns into a smear and photographic elements lose all edge definition.
The critical detail: upscaling a 72dpi file to 300dpi after the fact does not recover the missing data. Photoshop interpolates the new pixels and the result is still soft. Set your canvas resolution to 300dpi before you place a single element, not as a finishing step.
Setting up your file in Canva, Photoshop, and Illustrator
If you have not settled on a tool yet, our business card design software guide compares the applications people use to lay out a business card and helps you choose one before you begin. Once you have made that choice, the steps below cover the file setup for each application in turn.
Photoshop
Go to File, then New. In the dialog, set Width to 96mm, Height to 61mm (those are the 300dpi bleed dimensions), Resolution to 300 pixels/inch, and Colour Mode to CMYK 8-bit. This gives you a canvas that includes 3mm bleed on all sides. Place a rectangle guide at 3mm in from each edge to mark the trim line, and another at 6 to 7mm in from each edge for the safe area, where critical text and logos should sit.
Illustrator
Go to File, then New. Set Width to 96mm and Height to 61mm. Under Effect, then Document Raster Effects Settings, confirm the resolution is set to 300 ppi. Create two rectangles on a non-printing guide layer: one at 96 x 61mm (the bleed boundary) and one at 90 x 55mm centred on the canvas (the trim line). When you are ready to export, go to File, then Document Setup, set Bleed to 3mm on all sides, then export as PDF with marks and bleed enabled.
Canva
Canva works in pixels at the design stage. Create a custom design and enter 1134 for the width and 720 for the height, which are the 300dpi bleed dimensions for a standard business card. When downloading, always choose Download, then PDF Print rather than PNG or JPG. Canva’s PDF Print export uses a higher resolution than its default screen export. If you are on Canva Pro, the Download panel also offers the option to include crop marks and bleed, which makes it easier for the printer to cut accurately.
One common Canva trap: the canvas looks correct on screen but the designer skips the PDF Print step and downloads a PNG instead. PNGs from Canva default to 96dpi, which is too low for commercial printing. Use PDF Print every time.
Vector versus raster: when pixel dimensions stop mattering entirely
If your business card is built from a logo and text in a vector application such as Illustrator, pixel dimensions are largely irrelevant. Vector artwork is defined by mathematical curves and paths, not a fixed grid of coloured squares. A vector logo scales to any size with no loss of quality whatsoever. The printer renders it at whatever resolution the output device requires.
This is the best-case scenario for a business card. If your designer supplied an AI, EPS, or SVG file, you can hand it to any commercial printer at any size without worrying about the pixel count. The one exception is embedded raster content inside a vector file. If your logo contains a photograph or a PNG graphic, that embedded element is still a raster image and still needs to be at 300dpi.
Raster formats, including Photoshop PSD, flat PNG, flat JPG, and TIFF, are bound to the pixel grid set when the file was created. If you are working entirely in raster, 300dpi is the non-negotiable minimum for commercial print.
Exporting for print
- Format: PDF is the preferred format for commercial printing. A print-ready PDF embeds all fonts, flattens transparencies, and keeps colour profiles intact. JPG and PNG are accepted by many printers but are more prone to compression artefacts or stripped colour profiles.
- Colour mode: CMYK, not RGB. Screens display in RGB; printers use CMYK inks. An RGB file submitted to a printer will be converted, and that conversion can shift colours noticeably, particularly reds, oranges, and purples.
- Bleed: Include 3mm bleed on all sides. Without bleed, any minor shift during cutting leaves a white border along one or more edges.
- Fonts: Embed or outline all fonts before exporting. A font that is not embedded will substitute to a system default if the printer’s computer does not have it installed.
- File size: A well-built 300dpi PDF for a single business card face typically sits between 1 and 10MB. Much smaller usually means the resolution is lower than expected. Much larger can point to uncompressed rasters or unflattened transparency layers.
What to check before uploading your file
- Resolution is set to 300dpi, confirmed in the document settings before export
- Canvas includes bleed: 1134 x 720 px for a standard 90 x 55mm card at 300dpi
- Colour mode is CMYK, not RGB
- All fonts are embedded or converted to outlines
- No critical text or logos sit within 3mm of the trim edge
- File is exported as PDF Print, not as a screen or interactive PDF
- Proof read on the exported file itself, not in the editing view
Our standard business cards come with a downloadable template in the correct dimensions with guides already placed for bleed, trim, and safe area. If you are designing a custom shape, the full range of sizes and options is at our custom business cards category.
Frequently Asked Questions
What is the pixel size of a standard Australian business card at 300dpi?
A standard Australian business card (90 x 55mm) at 300dpi is 1063 x 650 pixels at trim size. With 3mm bleed included on all sides, the canvas should be 1134 x 720 pixels.
How do I convert millimetres to pixels?
Divide the millimetre measurement by 25.4 to convert to inches, then multiply by your dpi setting. For 90mm at 300dpi: 90 / 25.4 = 3.543 inches, then 3.543 x 300 = 1063 pixels.
Why does 72dpi cause blurry business cards?
A 72dpi file has approximately one-quarter of the pixel count needed for print. Text appears soft and photographic elements lose their edge sharpness. Always set your canvas to 300dpi before you start designing. Upscaling a 72dpi file afterwards does not recover the missing detail.
What pixel dimensions should I use for a business card with bleed?
For a standard 90 x 55mm Australian business card, use a canvas of 1134 x 720 pixels at 300dpi. This includes 3mm bleed on all four sides, which commercial printers require to avoid white borders after trimming.
What size is a round business card in pixels?
A circle business card (60 x 60mm) at 300dpi is 709 x 709 pixels at trim size, or 780 x 780 pixels when 3mm bleed is included.
What colour mode should I use for business card artwork?
Use CMYK. Screens display in RGB, but printers use CMYK inks. Submitting an RGB file forces a colour conversion that can shift warm tones and saturated colours in unpredictable ways.
Is a vector file better than a raster file for business cards?
For designs that are primarily type and a logo, yes. Vector artwork (AI, EPS, SVG) is resolution-independent and scales to any size without quality loss. If your design includes photography or a raster logo, those elements still need to be at 300dpi.
What is the safe area for a business card?
Keep all critical text and logos at least 3 to 4mm inside the trim edge. On a 90 x 55mm card, that means working within a safe area of approximately 84 x 49mm. Content placed in the safe area will not be at risk of being cut off during trimming.