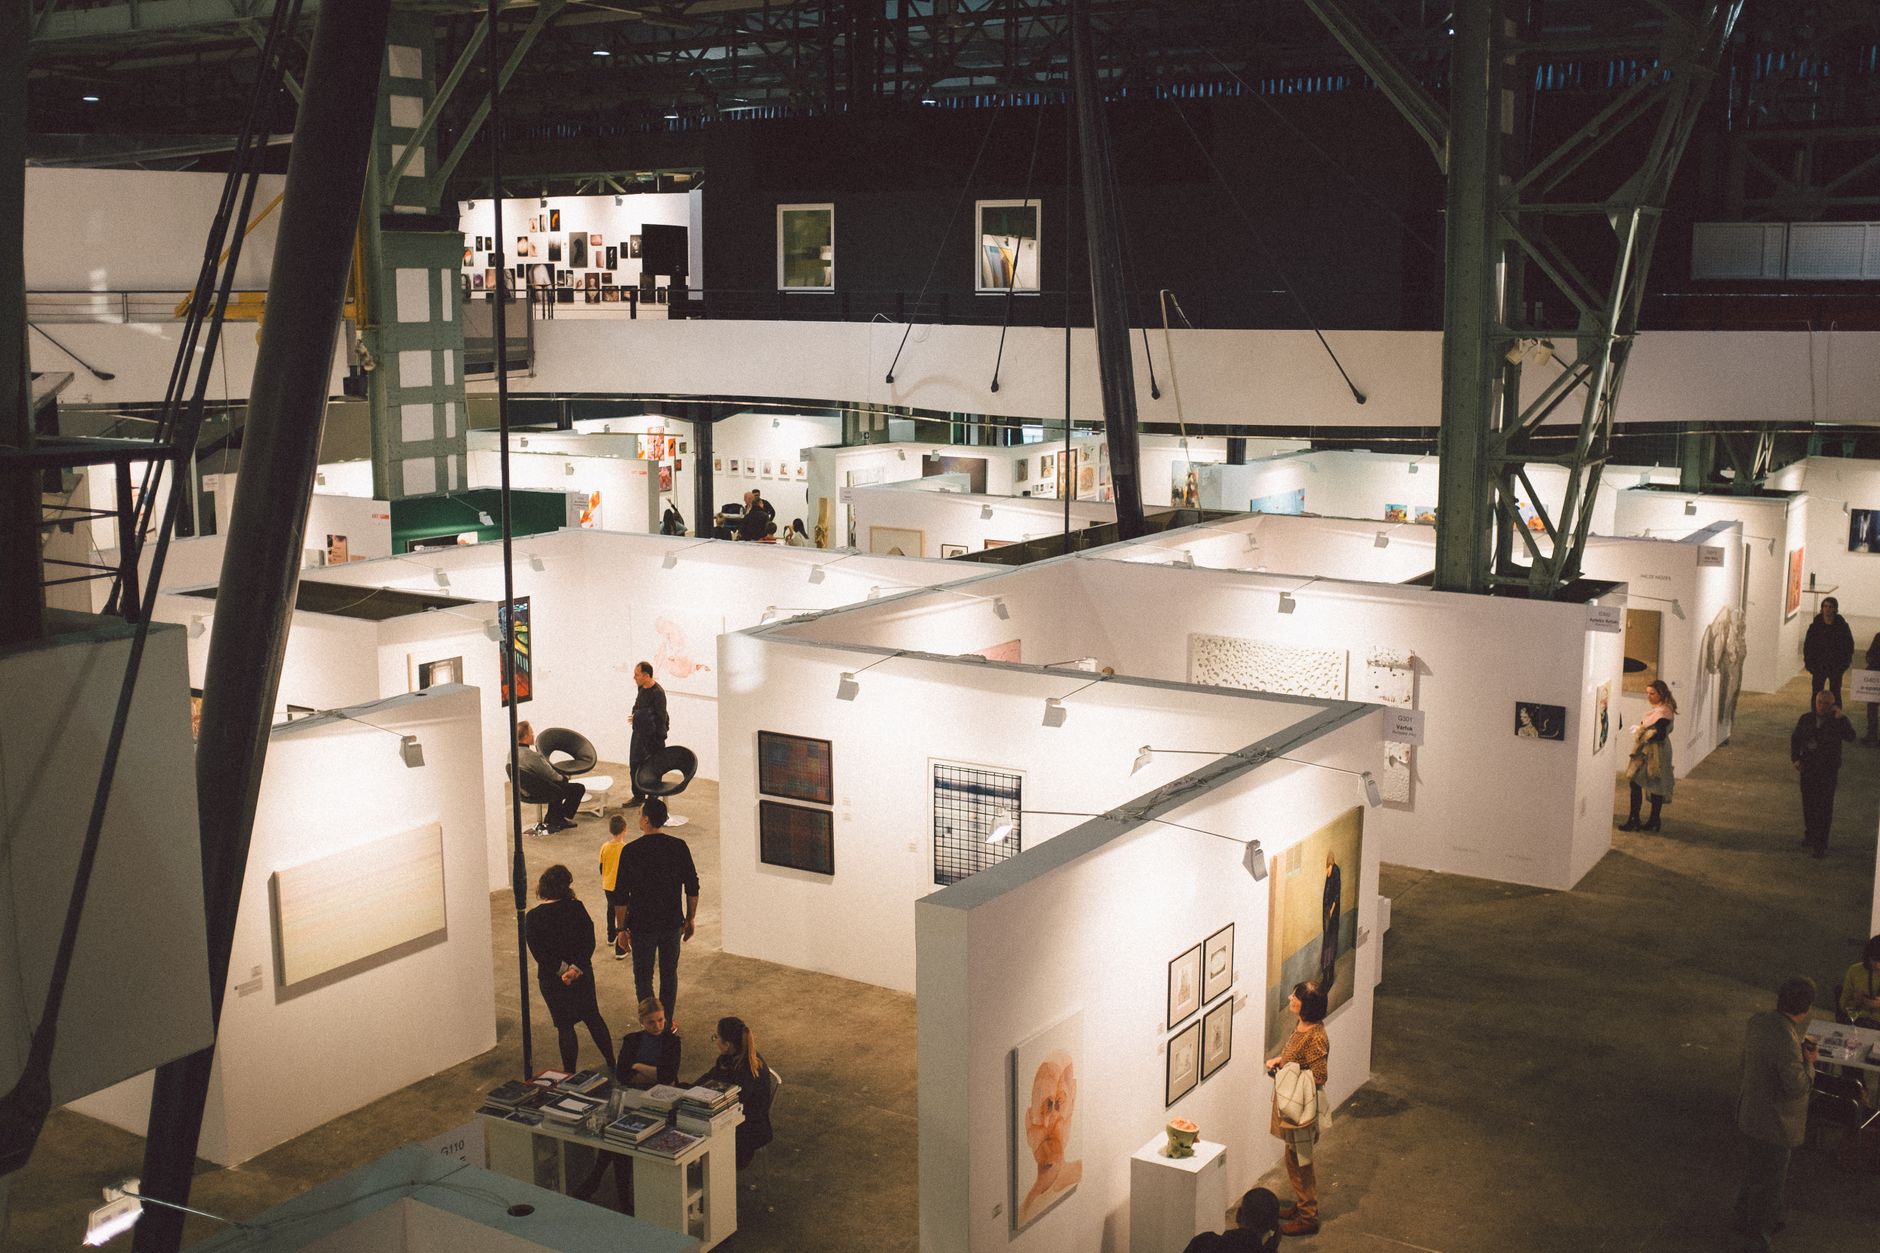
Exhibiting at a trade show is one of the highest-effort, highest-return marketing investments a small business can make. The print you bring to the booth is the backbone of that return: it draws people in from the aisle, tells your story in three seconds, and leaves something tangible in their hands after the show ends.
The problem is that exhibitors often realise they are missing something critical the week before the event. This checklist covers every print item you need, the artwork specs for each, realistic lead times, and how to transport and reuse your kit for multiple shows.
At a glance
- Booth backdrop: stretch-fabric media wall (most popular for trade shows), 2400 x 2400mm or wider
- Flanking banners: 850 x 2000mm pull-up banners, one on each side or at booth entry
- Handouts: A5 flyers on 150gsm or DL flyers for pocket-friendly distribution
- Business cards: minimum 250 per day on the floor; 350gsm matte or gloss
- Swag stickers: die-cut to your logo or product shape; draws foot traffic
- Order window: allow at least 7 business days before the show; 10-14 days for media walls
The 5 Print Items Every Exhibitor Needs
A complete booth kit has five layers: the backdrop that defines your space, the flanking banners that extend your brand, the handouts that give visitors something to take away, the business cards that close conversations, and the branded swag that travels home with prospects and keeps working after the show.
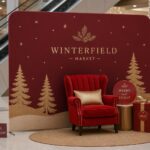
1. The Booth Backdrop: Stretch-Fabric Media Wall
Your media wall is the single most visible print asset at the booth. It fills the back wall of your space and is visible from 10-15 metres away, which means it needs to read clearly at distance: large logo, dominant brand colour, one-line value statement maximum.
Why stretch-fabric beats vinyl for indoor trade shows
Stretch-fabric media walls use a lightweight aluminium frame with a tension-fitted fabric graphic that wraps over it. They pack into a carry bag, set up in under 10 minutes, and produce no hard folds or crease lines that degrade the print. For air-conditioned exhibition halls, fabric holds its shape and resists sag better than a vinyl banner hung from a frame.
When a framed hanging banner suits the space better than fabric, our vinyl banners print on heavyweight PVC with hemmed edges and eyelets.
See our guide to stretch-fabric vs vinyl media walls for a full material comparison if you are deciding between the two.
For flat-hung fabric perimeter displays without a frame, custom fabric banners use the same woven polyester stock and pack flat for transport.
Common sizes for trade show booths
| Booth space | Recommended media wall width | Notes |
|---|---|---|
| 1.8m x 1.8m (3.24sqm shell) | 1800mm | Tight fit; keep frame within footprint |
| 2.4m x 2.4m (standard inline) | 2400mm | Most common exhibition size in Australia |
| 3m x 2.4m (corner or island) | 3000mm | Two-panel systems available |
| 6m x 2.4m (large island) | Two x 3000mm panels | Connect frames for continuous graphic |
For detailed size breakdowns including height options, read the media wall sizes guide.
Artwork spec for stretch-fabric media walls
- Resolution: 100-150dpi at final size (fabric printing does not require 300dpi)
- Colour mode: CMYK
- File format: PDF or high-res JPG
- Bleed: 80-100mm on all sides to wrap over the frame tubes
- Safe zone: keep logos and text at least 50mm inside the trim edge
Order your stretch fabric media wall online.
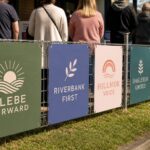
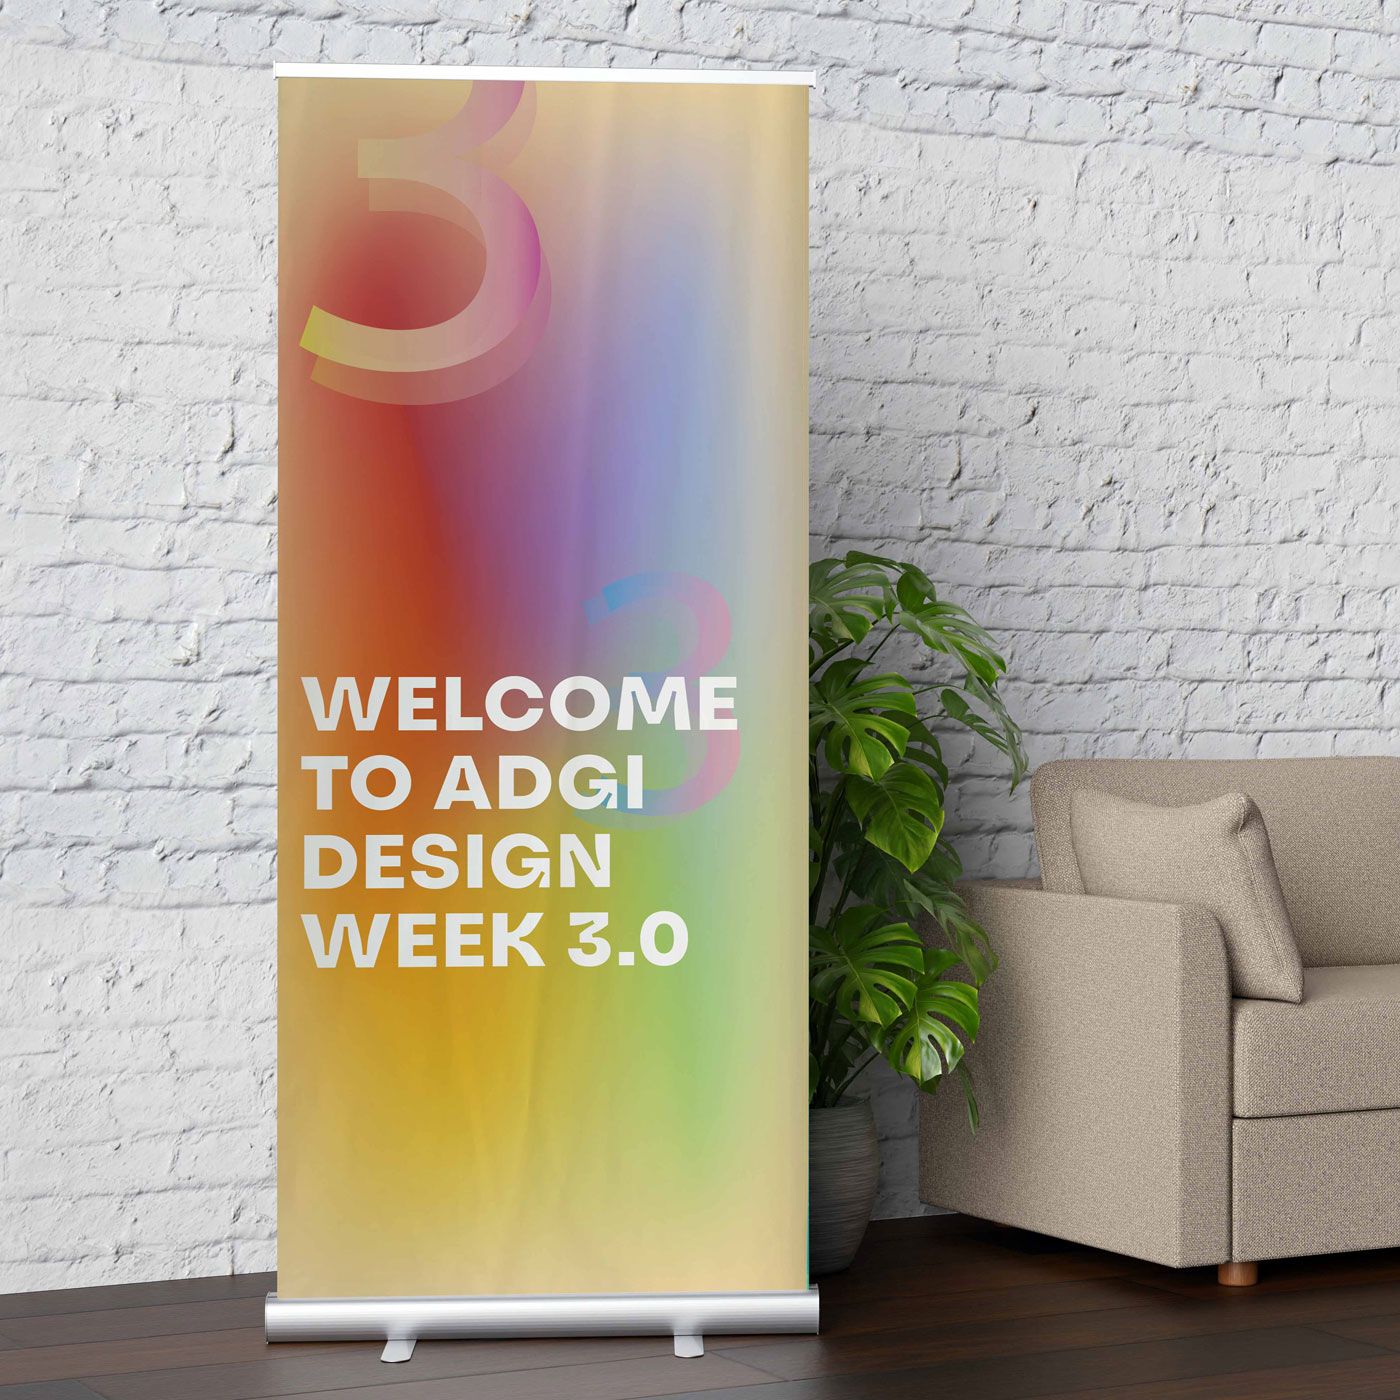
2. Flanking Banners: Premium Retractable Pull-Up Banners
While the media wall anchors the back wall, retractable banners work the perimeter. Place one at each entry point of your booth or on the flanks of your table to extend your branding into the aisle and pull passing foot traffic towards you.
Pull-up banners also serve as portable signage that you can deploy without a full booth: at smaller events, local markets, store openings, or wherever a quick branded presence matters.
Standard pull-up banner sizes in Australia
| Size | Dimensions (W x H) | Best for |
|---|---|---|
| Narrow | 600 x 1800mm | Low-footprint; counters and small stands |
| Standard | 850 x 2000mm | Most common booth flank and entry banner |
| Wide | 1000 x 2000mm | Higher-impact, slightly more floor space |
| Double-sided | 850 x 2000mm (both faces) | Aisle-facing positions where both sides are visible |
The pull-up banner sizes and specs guide has artwork templates for each size.
Artwork spec for retractable banners
- Resolution: 150dpi at final size
- Colour mode: CMYK
- File format: PDF (preferred) or high-res JPG
- Bleed: 5mm on all edges
- Safe zone: keep text and logos at least 30mm from each edge; the bottom 100mm sits inside the cassette and will not be visible
For design best practices specific to trade show environments, see how to design a trade show banner that reads from 5 metres.
Reuse and transport tips
Premium retractable banners use a spring-loaded cassette that retracts the graphic between events. Most cassettes last hundreds of cycles. The graphic itself can be replaced independently if you update your branding, which makes the hardware a long-term investment. Store the banner in its carry bag away from direct sunlight to prevent the material from yellowing between events.
Order at printshop.paperlust.co/products/premium-retractable-banners.
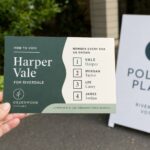
3. Handout Flyers: Something Tangible to Take Away
A booth conversation ends; a well-designed flyer extends it. Visitors pick up flyers from a table display as they walk past without needing to speak to anyone, making flyers one of the highest-volume touchpoints at any exhibition.
Flyer formats for trade shows
| Format | Dimensions | Weight/Finish | Best use |
|---|---|---|---|
| DL | 99 x 210mm | 130-150gsm gloss | Pocket-friendly; letterbox-style rack display |
| A5 | 148 x 210mm | 150gsm gloss or silk | Product overviews, service menus |
| A5 double-sided | 148 x 210mm | 150gsm silk | Full campaign content front and back |
| A4 folded to DL | 210 x 297mm folded | 150-170gsm | Brochure-style with multiple panels |
How many to print
A common mistake is under-printing. For a two-day trade show with moderate foot traffic, start with 500 DL or 300 A5 flyers per day. Busy shows with high-traffic aisles can move through 800-1,000 DL units per day. It is cheaper to print more and bring home leftovers than to run dry on day two.
Design tips for flyers at exhibitions
Flyers are picked up and scanned in under 10 seconds. Put the one action you want the reader to take on the front: a QR code to your product page, a show-exclusive offer, or a demo booking link. The back can carry product detail. Never put a wall of text on either side.
See all flyer formats and artwork specs at printshop.paperlust.co/products/flyers.
4. Business Cards: Close Every Conversation
At a trade show, you are meeting buyers, distributors, and potential partners face to face. A business card closes that conversation with something they carry home. Unlike a flyer (which gets stacked on their desk with everyone else’s), a business card handed personally is retained at a much higher rate.
Spec recommendation for trade show business cards
- Stock: 350gsm minimum; 400gsm for a premium feel that stands out in the stack
- Finish: matte laminate for a tactile, modern result; gloss for colour vibrancy
- Quantity: carry at least 250 per day on the floor; print 500 for a two-day event, more for a flagship annual show
- Format: standard 90 x 55mm or square 55 x 55mm for differentiation
If you want your card to be remembered, a die-cut shape or premium finish changes the experience entirely.
Order at printshop.paperlust.co/products/standard-business-cards.
5. Swag Stickers: Foot Traffic Bait and Brand That Travels
Branded stickers are an underrated trade show tool. They draw children and younger visitors to the booth (who influence parent buying decisions at consumer shows), they get stuck on water bottles, laptops, and equipment, and they put your brand in front of new eyes every day after the show.
Best sticker types for trade show giveaways
| Type | Best for |
|---|---|
| Die-cut to logo shape | Highest brand impact; cut to your exact logo or icon |
| Circle 70mm | Generic, versatile; low cost per unit in bulk |
| Sheet of mixed shapes | Variety pack giveaway; higher perceived value |
Die-cut stickers produce the strongest impression because the outline follows the logo or character shape, making the brand instantly readable. A generic circle sticker with a logo centred on it is far less effective.
Keep the design simple: a single icon or logo mark, your URL, nothing else. Small text at sticker scale becomes unreadable.
Order at printshop.paperlust.co/products/die-cut-stickers.

Branding Consistency Across the Kit
Every item in your booth kit should feel like it comes from the same brand. That means consistent logo placement, consistent colour values (CMYK, not RGB), and consistent typography. Print items produced at different times or at different suppliers often diverge in colour, which is visually jarring when they sit side by side on a table.
Practical consistency checklist
- Use a single CMYK colour palette document for all files. Convert RGB values once and lock them.
- Use the same logo file (vector EPS or AI) for all print items. Do not rescale a PNG version for each one.
- If you are producing files in Canva or Adobe Express, export as PDF with CMYK colour profile where the tool supports it (Canva Pro supports CMYK export; free tier does not).
- Order your media wall, banners, flyers, and business cards from the same supplier to minimise colour calibration variation between presses.
Budget-Tiered Starter Kits
Not every exhibitor has the same budget or booth size. Below is a tiered view of how to prioritise your print spend.
| Tier | Budget range | What to print | What to skip |
|---|---|---|---|
| Lean (first show, small booth) | Under $500 | 1 x pull-up banner + 300 flyers + 250 business cards | Media wall; stickers |
| Standard (regular exhibitor) | $500-$1,500 | Media wall + 2 x pull-up banners + flyers + business cards | Premium stickers |
| Full kit (flagship or annual show) | $1,500+ | Full media wall + 2-3 banners + flyers + business cards + die-cut stickers | Nothing; this is the complete set |
The lean tier is a perfectly respectable starting point. A single 850 x 2000mm pull-up banner, 300 DL flyers, and a box of well-designed business cards is a functional booth presence that many larger competitors fail to execute well.
Lead Times and Ordering Timeline
Exhibition deadlines are fixed and non-negotiable. Build your ordering window backwards from the show date.
| Item | Recommended order lead time | Notes |
|---|---|---|
| Standard business cards | 5-7 business days | Longer if die-cut or special finish |
| DL and A5 flyers | 5-7 business days | |
| Die-cut stickers | 7-10 business days | Complex shapes take longer |
| Premium retractable banners | 7-10 business days | |
| Stretch-fabric media walls | 10-14 business days | Larger widths or double panels at upper end |
Order sequence recommendation
- Place the media wall order first (longest lead time).
- Order banners within 1-2 days of the media wall.
- Order flyers and stickers at the same time to consolidate shipping.
- Order business cards last if you have existing stock, or at the same time as step 3 if reprinting.
Allow an additional 2-3 business days if you need proofs reviewed before print approval.
Artwork tip: get print-ready files done before ordering
The single biggest cause of delays is artwork that needs revision after submission. Submit CMYK PDF files with 3-5mm bleed and embedded fonts from the start. A file that goes straight to press skips the back-and-forth and uses your lead time for actual production.
Post-Show Storage and Reuse
Trade show print is a capital investment, not a one-use cost. Maximise the return by storing and reusing it correctly.
Media walls and banners
- Roll fabric graphics loosely, never fold them. Folds become permanent creases that show on the face.
- Store aluminium frames disassembled in their carry bags, away from moisture.
- Most retractable cassettes allow you to replace the graphic insert without replacing the hardware.
Flyers and stickers
- Store in a dry, flat location away from direct sunlight.
- Leftover flyers from a trade show can be redirected to letterbox campaigns or reception-desk distribution.
- Leftover stickers are excellent as order-insert swag, handed out at the next event, or included with direct-mail campaigns.
Frequently Asked Questions
What size media wall is best for a standard 3x3m trade show booth in Australia?
A 2400 x 2400mm media wall is the most common choice for a 3x3m shell. It covers the full back wall with clearance on each side, allowing room for staff and furniture. If your booth faces a high-traffic aisle and you want maximum visual impact, a 3000 x 2400mm wall fills the space wall-to-wall.
How many pull-up banners do I need for a trade show?
Most exhibitors use two: one on each flank of the booth or one at the front-left entry and one at the front-right. A third banner is useful for exhibition layouts where your booth is visible from multiple aisle directions, or if you want to create a side corridor effect.
What is the best flyer size for trade shows?
DL (99 x 210mm) is the most popular trade show flyer format because it fits in a shirt pocket or handbag without folding. A5 (148 x 210mm) suits product-heavy content where you need more space for images and specifications. Use DL for high-volume giveaway distribution and A5 for qualified leads you speak to directly.
How far in advance should I order trade show print?
Order your media wall and retractable banners at least 10-14 business days before the show. For flyers, business cards, and stickers, 7-10 business days is sufficient. Always add a buffer for artwork revision rounds. Ordering two weeks out for the full kit is a safe rule for most Australian exhibitors.
Can I reuse a pull-up banner at multiple trade shows?
Yes. Premium retractable banners are designed for repeated use. The cassette mechanism is rated for hundreds of retraction cycles. Store the banner in its carry bag between events and keep it out of direct sunlight to maintain graphic quality. If you rebrand, many cassettes accept a replacement graphic without needing a new base.
What file type should I submit for trade show print?
Submit PDF files in CMYK colour mode with at least 3mm bleed on all sides (5mm preferred) and embedded fonts. For large-format items like media walls and banners, 100-150dpi at final print size is sufficient. For smaller items like flyers and business cards, 300dpi is the standard.
Do I need different artwork for the media wall and the pull-up banners?
Yes. Each piece needs its own artwork sized to its exact print dimensions. However, they should share the same colour palette, logo file, and visual language. A common approach is to design the media wall first as the brand centrepiece, then adapt elements for the banners to create a cohesive booth aesthetic.
Ready to Order Your Trade Show Kit?
Start with the item that has the longest lead time. Order your stretch-fabric media wall first, then your premium retractable banners, then consolidate flyers, business cards, and die-cut stickers into a single order to simplify shipping.
If this is your first time exhibiting and you are not sure where to start, the lean kit (one pull-up banner, a box of business cards, and 300 flyers) gives you a professional presence without the full investment. Upgrade the kit as you refine what works for your industry.